Showing posts with label weekend cooking. Show all posts

Sunday, February 20, 2011

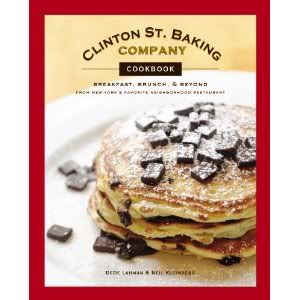
Weekend Cooking - Clinton St. Baking Cookbook

Weekend Cooking is open to anyone who has any kind of food-related post to share: Book (novel, nonfiction) reviews, cookbook reviews, movie reviews, recipes, random thoughts, gadgets, fabulous quotations, photographs. If your post is even vaguely foodie, feel free to grab the button and link up anytime over the weekend. Please link to your specific post, not your blog's home page. For more information, see the welcome post. (hosted by Beth Fish Reads)


I have yet another cookbook review for you.  This is actually rather impressive since I'm not known for actually looking at/reading cookbooks...and this is cookbook #2!   I first read a review about this cookbook on a weekend cooking post over at Bermudaonion's blog. I just knew I had to check it out for myself.

This cookbook is another one where the recipes are form an actual bakery, Clinton St. Baking Co in New York.  Once again, this is another cookbook where I had so many recipes marked that I wanted to try, I returned it knowing I would end up buying the book.  Oh, and if I remember correctly there is a picture for each recipe.

Before returning the book to the library I actually made one of the recipes.  Once again, I made this specific recipe because I walked into the kitchen and Husband had the book open to the recipe in a silent plea to make it for him.   Nice wife that I am (and the fact that I had some heavy whipping cream that expired that day and would rather use it than throw it away) I made him the dessert requested, Flourless Chocolate Cake.
I might be a pain in the butt, but Husband will keep me around because he has decided the flourless chocolate cake is one of his top 3 desserts...ever.   That's rather high praise don't you think?  I thought it was good, but didn't like it as much as he did and that's due to one of the changes I made with the recipe.  I took a piece in to work and gave it to a co-worker since he has candy out on his desk and I'm always eating it.  He thought it was really good too.   It's very rich and Husband knew he couldn't eat the whole thing, so he had me take some to his Mom so his parents could have some (I work with his Mom).  I gave them a rather large chunk, with it as rich as it is the piece was enough for 4-6 servings.  By the time I got home that day, Husband had already talked to his parents and they finished it.  They ate it all.  They loved it.  I took them more the next day.

While walking Myla, Husband stressed the need for me to copy the recipe and write down all the changes I made to it. I said..oh, I didn't make that many.  So he went over with me what I did differently and each time I said "oh yeah, I did this too." He told me to write it down exactly as I did it so I can make it the exact same way again.  It's going to be upsetting if I make it again and he doesn't like it as much. I've been feeling rather good about myself for making such a wonderful dessert.

This dessert was not hard to make, but there are some different steps to it and some things that require you to whisk for awhile which can be uncomfortable for our arms.  I'm going to post the recipe for this one and at the end I will let you know what I did differently.


Flourless Chocolate Cake
From: Clinton St. Bakery

Makes one 10-inch cake

Ingredients
1 Tablespoon unsalted butter, room temperature
¼ cup plus 1 cup sugar
1 ¼ cup strong, freshly brewed or cold coffee
3 ¾ cups semisweet chocolate chunks (52 – 62% cacao)
7 large eggs
1 ¾ cups heavy cream, chilled
½ cup unsweetened cocoa powder, sifted

Raspberry Caramel Sauce (page 178)
Real Whipped Cream (optional; page 178)

Directions
1. Preheat oven to 325F.  Lightly grease a 10-inch springform cake pan with the butter.  Add ¼ cup of sugar to the pan.  Shake the sugar along the buttered sides and bottom so that the pan is coated.  Tap the pan with your fingers to release any excess sugar and discard.

2. If the coffee is hot, pour it over the chocolate chunks in a bowl and whisk quickly to melt the chocolate.  If the coffee is not hot, place the chunks and coffee together in a microwave-safe container and heat together for 1 to 2 minutes on high, until the chocolate is melted.

3. Bring a pot of water to a simmer.  In a metal or glass bowl, whisk together the eggs with the remaining cup sugar.  Place the bowl over the simmering water and whisk continuously until the eggs become light and fluffy.

4. In a separate bowl, whip the cream to medium peaks either by hand or with a handheld mixer.

5. Add the coffee-and-chocolate mixture to the eggs in two stages, folding between each stage. Gently fold in the cocoa powder and then the whipped cream, using the same method.

6. Pour the batter in the prepared pan. Wrap the bottom of the springform in heavy-duty foil.  Pleace the pan in a shallow baking dish and fill the dish with hot tap water until the water comes up 1 to 2 inches along the sides of the pan.

7.  Bake for 1 hour and 20 minutes.  Turn off the oven, prop open the oven door, and allow the cake to cool in the oven for 30 minutes.  Remove the cake from the oven and cool for 2 hours in the fridge or at room temperature.

8.  To serve, remove the outer ring of the pan.  Cut the cake into clean slices using a knife dipped in warm water and wiped in between slices.  Serve with Raspberry Caramel Sauce and Real whipped Cream.


My changes:
1) I didn’t measure the butter or the sugar that went into the sprinform pan, I just used a little as needed.

2) Instead of coffee I used Kahlua (we don’t have coffee in the house and I figured this was the closest substitute) ***This is why I don't like the recipe as much, the alcohol taste is too strong for me.

3) For the chocolate, I used what I had in the house at the time. I used 1 bag of special dark Hershey chocolate chips and one bag of semi-sweet chips.

4) I did not make the raspberry caramel sauce or the whipped cream.

5)I didn’t have a pan large enough for me to put a 10-inch springform pan into, so I used a smaller springform pan and put it in a pot that was just barely big enough. 

6) I only cooked it for 1 hour 10 min, but that’s because our oven cooks faster.  I did leave it in the oven for 30 min after I turned it off and opened the door. 

Sunday, February 13, 2011

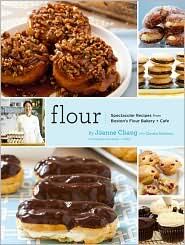
Weekend Cooking: Flour by Joanne Chang

Weekend Cooking is open to anyone who has any kind of food-related post to share: Book (novel, nonfiction) reviews, cookbook reviews, movie reviews, recipes, random thoughts, gadgets, fabulous quotations, photographs. If your post is even vaguely foodie, feel free to grab the button and link up anytime over the weekend. Please link to your specific post, not your blog's home page. For more information, see the welcome post. (hosted by Beth Fish Reads)


I first heard about this book from a Weekend Cooking post at Beth Fish Reads.  The book sounded so good, I knew I had to check it out and immediately requested it from my library.


Flour is a cookbook based on the recipes used at Flour Bakery in Massachusetts.  I dare you to check out their website, unless you are trying to lose weight.  Then run far far away because once you see the pictures of their desserts, you'll be wanting something yummy to eat.


Once I got the book, I started flipping through it and was in love. I loved the photo's and the recipes sound so yummy.   I loved that there was a section on ingredients and on some different techniques.   In fact, a day or two before I read the section on ingredients I was talking to my friend about baking cookies.  She asked me if I used salted or unsalted butter and which was recommended.  I mentioned that I only bought unsalted butter.  I had never read anything about which is right, but one day on a whim I decided to buy unsalted and baked with it and never noticed a difference so I've never changed back to salted.   Well, this book says to always (unless otherwise specified) use unsalted butter.  This way the salt used when baking is correct and you don't have more salt due to there being salt in the butter as well as what you add as an ingredient.  So..now we know!  I'm glad I've been doing it right. haha!


After hanging on to this book for a couple of weeks, I had marked over half the recipes as ones I wanted to try.  I ended up returning the book to the library and the following week Borders had a 50% off coupon and I used that to buy it. 


I have since only made one recipe but boy was it good.  Husband and seen the book out and flipped through it one day and decided he wanted chocolate eclairs.  One day I walked into the kitchen and the book was out and held open on the chocolate eclair recipe.  I can take a hint. 


The recipe itself wasn't exactly hard, but there were a lot of steps to it.  It's not something that a non-baker would want to try right away, in my opinion.  I won't say I'm an awesome baker, but I do enjoy it and love to try new things, so I was up for the challenge.   The pastry part didn't puff up like it should have and I think I know where in the steps I went wrong, but that's the only issue I had.  I was still able to make them, they were just rather flat.    I have to say, they were really really good.   Husband really liked them, even took them to work for dessert.   We gave one to my FIL and he enjoyed it too and said it tasted like one he had at a restaurant recently, only mine was a tad better because it was fresh. 


I definitely recommend you check this one out at the library or flip through it at a book store.  I don't think all recipes are going to have as many steps as this one did, some are bound to be easier and some harder.  


Husband has decided that I should bake him something every weekend, so he has dessert throughout the week. So far this hasn't worked out as well as he had planned.  I have no willpower and if we have desserts and I like them, I'm going to eat them too. I don't want to eat them every day, which means I'm not baking him something every weekend.  haha!  However, this does mean that I'll be trying more recipes from this cookbook as the year progresses and I'll be sure to keep you updated on what happens.  I'll also plan on taking pictures (when things turn out correctly). 

Sunday, January 30, 2011

Weekend Cooking - Apple Streusel Muffins

Weekend Cooking is open to anyone who has any kind of food-related post to share: Book (novel, nonfiction) reviews, cookbook reviews, movie reviews, recipes, random thoughts, gadgets, fabulous quotations, photographs. If your post is even vaguely foodie, feel free to grab the button and link up anytime over the weekend. Please link to your specific post, not your blog's home page. For more information, see the welcome post. (hosted by Beth Fish Reads)


I love cinnamon streusel muffins, but have never made any of scratch.  I went looking for a recipe a couple weekends ago and when I found this one, I couldn't wait to try it since I had some apples that needed to be used.  I found this recipe on Tasty Kitchen.  I felt this recipe was a success and I'll be making it again.


Ingredients

  • FOR THE TOPPING:
  • ½ cups Brown Sugar
  • ¼ cups Flour
  • ¼ cups Margarine
  • ½ teaspoons Cinnamon
  • _____
  • FOR THE MUFFINS:
  • 1-½ cup Flour
  • ½ cups White Sugar
  • 3 teaspoons Baking Powder
  • ½ teaspoons Baking Soda
  • ¼ teaspoons Salt
  • 1 whole Egg
  • ½ cups Sour Cream
  • ¼ cups Cooking Oil
  • 2 Tablespoons Milk
  • 1 cup Apples, Peeled, Cored And Chopped

Directions
With a fork combine topping ingredients together until crumbly.
In another bowl, mix together dry batter ingredients, then beat in the wet ingredients. Fold in apples.
Place batter in greased or lined muffin tins, sprinkle with topping. Bake at 400° for 20-25 minutes.
Makes 12 muffins

********
I did make some changes to the above recipe.   I felt the batter was too thick, so I added some applesauce to add more liquid to it.   This did thin it out a bit and I ended up making 14 cupcakes instead of 12.  I didn't measure how much applesauce I added, I just sort of dumped some in.

I also added more cinnamon than what it calls for, but didn't measure the extra. I love cinnamon so I wasn't worried about having too much.

I used wheat flour instead of normal white flour.  Since this is the first time I made this recipe I can't tell you if it changed the taste at all, but I know I didn't notice it tasting different or the texture being different.

One change I will make the next time I make them, instead of using any cooking oil, I'll substitute applesauce. This makes it healthier.

Sunday, January 23, 2011

Weekend Cooking: Chicken Noodle Soup

Weekend Cooking is open to anyone who has any kind of food-related post to share: Book (novel, nonfiction) reviews, cookbook reviews, movie reviews, recipes, random thoughts, gadgets, fabulous quotations, photographs. If your post is even vaguely foodie, feel free to grab the button and link up anytime over the weekend. Please link to your specific post, not your blog's home page. For more information, see the welcome post. (hosted by Beth Fish Reads)


The last two weeks I shared soup recipes because I first had left over ham and then I had left over celery and carrots. Well, you guessed it, this week I'm sharing another soup recipe because we still had left over celery and carrots.
This is one that a friend emailed to me and I believe she got it from Fitness Magazine.    It's really easy to make and pretty tasty too.  It also freezes well.


Ingredients:
one rotisserie chicken (we use the pre-cooked ones you buy from the grocery store, but you could cook your own chicken if you so desire)
1 onion, chopped
3-4 stalks celery, chopped
3 carrots, peeled and cut into coins
thyme, fresh or dried
2 quarts cold water
1 package egg noodles (or whatever kind you like)


Place a rotisserie chicken in a large pot with the onion, celery, carrots, thyme, and water. 
Bring to a boil and then simmer for 20 minutes.  


Remove the chicken (leave veggies in stock). Remove the skin and take chicken off the bones. Shred chicken and place back in soup pot. 


Bring back up to a boil and add noodles. Reduce heat again and simmer until noodles are cooked. 


Before serving, squeeze fresh lemon juice over bowl.


Sunday, January 16, 2011

Weekend Cooking - Minestrone Soup

Weekend Cooking is open to anyone who has any kind of food-related post to share: Book (novel, nonfiction) reviews, cookbook reviews, movie reviews, recipes, random thoughts, gadgets, fabulous quotations, photographs. If your post is even vaguely foodie, feel free to grab the button and link up anytime over the weekend. Please link to your specific post, not your blog's home page. For more information, see the welcome post. (hosted by Beth Fish Reads)


Last week I shared with you a recipe for Ham and Bean soup.  We made it because we had left over ham.  Well, after that we were stuck with left over celery and carrots.  Not something we eat in our normal diet.  I had been chatting with a friend and she had to go because she need to start making dinner, minestrone soup. The next day I was thinking about that and had a eureka moment, I bet minestrone soup uses carrots and celery.  I emailed my friend and she kindly shared the recipe.  I thought it was pretty tasty so I'm going to share it with you.


Winter Minestrone

3 Tbs olive oil
1 lg onion, finely chopped
1 large stalk celery, finely chopped
2 large cloves garlic, pressed or minced
1 tsp dried basil
1/2 tsp each dry rosemary, dry oregano, and dry thyme
1/4 tsp crushed dried red pepper, if desired
1/4 cu dry barley, rinsed and drained 
2 med thin skinned potatoes (~ 12 oz total), diced
2 large carrots, diced
2 quarts vegetable broth (I use low sodium and adjust salt to taste at end)
1 large turnip, peeled and diced
1 can red kidney beans or white kidney beans (canellini)
2/3 cu small dry shell, elbow, or other shaped macaroni
1/4 cup tomato paste 
2 cups finely shredded green cabbage, swiss chard, or kale
salt and pepper to taste

Heat oil in a 5 to 6 quart pot over medium heat. Add onion, celery, garlic, basil, rosemary, oregano, thyme, and crushed red pepper (if using). Cook, stirring often, until onion is soft (8-10 min).

Add barley, potatoes, carrots, and broth. Bring to boil and reduce heat to gentle boil for 20 minutes.

Add turnip and continue to cook 20 more minutes. (*Now is when to add fresh green beans or peas and zucchini.)

Stir in macaroni and tomato paste and bring to boil. Reduce heat, cover, and boil gently 12-15 minutes or until macaroni is tender to bite. (*recipe says to add beans now but I find boiling them makes them get mushy and fall apart. You can also add now frozen green beans or peas.)

Add beans and their liquid and cabbage (or other greens) and cook uncovered until cabbage is tender (about 5 more minutes, depending on greens).

Season to taste with salt and pepper.

We made some changes to it.  I had planned to buy kale since I like to eat it with my salads and it's super healthy for you, but all the kale at the store looked bad.  Husband and I aren't cabbage fans, so we left out the 2 cups of the cabbage or kale all together.  I'm not a huge fan of pepper or hot spices, so no crushed red pepper for us either (although Husband sprinkled some in his bowl).  Husband and I are a huge fan of noodles, so we added a lot more noodles. I think it ended up being too much, he thought it was perfect. I didn't measure though, just grabbed handfuls and threw it in.   We did put a turnip in the soup.  Neither one of us was sure about it, couldn't remember ever eating turnip, but we did it and I couldn't pick it out of the soup as something that tasted bad, so I would use it again. 

Sunday, January 9, 2011

Weekend Cooking - 1 Hour Ham and Bean Soup


Weekend Cooking is open to anyone who has any kind of food-related post to share: Book (novel, nonfiction) reviews, cookbook reviews, movie reviews, recipes, random thoughts, gadgets, fabulous quotations, photographs. If your post is even vaguely foodie, feel free to grab the button and link up anytime over the weekend. Please link to your specific post, not your blog's home page. For more information, see the welcome post. (hosted by Beth Fish Reads)

Husband and I had ham for Christmas dinner and the next day he went searching online for a ham and bean soup so we could use some of the leftover ham.  He made it last year, but I wasn't too fond of the texture so he went looking for a new recipe.     This new one was a success!  It wasn't thick like the one the year before and it was very taste.  (I have issues with texture when I eat and don't like a thick broth)

The recipe comes from Food.com.

1-Hour Ham and Bean Soup

Ingredients
3 tbsp vegetable oil
1 1/2 cup diced or sliced carrots
1 11/2 cups diced celery
1 1 /2 cups chopped onions
3 cups cubed ham
3/4 teaspoon minced garlic
5 1/4 cups ham stock or chicken broth (water can be substituted)
3 cans (23 1/4 oz) great northern beans, not drained
4 1/2-6 tbsp tomato sauce (Husband wrote 3-4 next to this, so I don't know if he used 3-4 this time around or was making a note to only use 3-4 next time)
1 1/2 tsp to taste Pepper

Directions
Heat vegetable oil in a soup pot.
Add carrots, celery, and onion.
Saute for about 4 minutes, just until onion is beginning to soften.
Add ham, saute 2 minutes.
Add garlic, saute one more minute
Add 3 cups stock, bring to a low boil for about 10 minutes, stirring once or twice.
Meanwhile, in a food processor, combine all but 1/2 of a can of beans, including juice,  and the tomato sauce.
Process until smooth.
Add remaining stock to processor to think mixture.
Process to combine.
Add mixture from processor into ham mixture.
Add remaining 1/2 can of beans, stir to blend, bring a boil, lower heat, cover and simmer for 30 minutes.

Sunday, September 5, 2010

Weekend Cooking: Homemade Crescent rolls

Weekend Cooking is open to anyone who has any kind of food-related post to share: Book (novel, nonfiction) reviews, cookbook reviews, movie reviews, recipes, random thoughts, gadgets, fabulous quotations, photographs. If your post is even vaguely foodie, feel free to grab the button and link up anytime over the weekend. Please link to your specific post, not your blog's home page. For more information, see the welcome post.


This week I thought I would share my recipe for making crescent rolls.   Husband and I are bread junkies.  We love to have bread with dinner almost every night.  Once I was given this recipe by a friend, it became so much easier for us. Now, instead of buying crescent rolls and having to make all of them and eating them all, we only eat one or two each with dinner.  It's also less expensive than buying frozen rolls.   I always make a double batch and then freeze them.  When Husband makes dinner, he takes 3 out of the freezer and heats them up in the oven.  That's it!  Incredibly simple!   The rolls always taste fresh when we eat them. I don't know if that's just because they freeze well or because we go through them so fast they don't have time to get stale.  Either way, it tastes like fresh, homemade rolls even when coming from the freezer.

Ingredients
3 - 3 1/4 cup flour
1 pkg dry yeast
1 tsp salt
1 cup milk
3 tbsp butter
1 egg
1/4 cup sugar.

In a saucepan heat the milk and butter until very warm.

In a large mixing bowl, mix 1 cup flour, dry yeast, salt and sugar.  Add the milk and butter mixture once warm.  Add the egg.

With mixer, beat for 2 minutes. Stir in the remaining 2 - 2 1/4 cup flour to form a stiff dough.

Cover and let rise until it doubles in size, about 60-90 minutes.

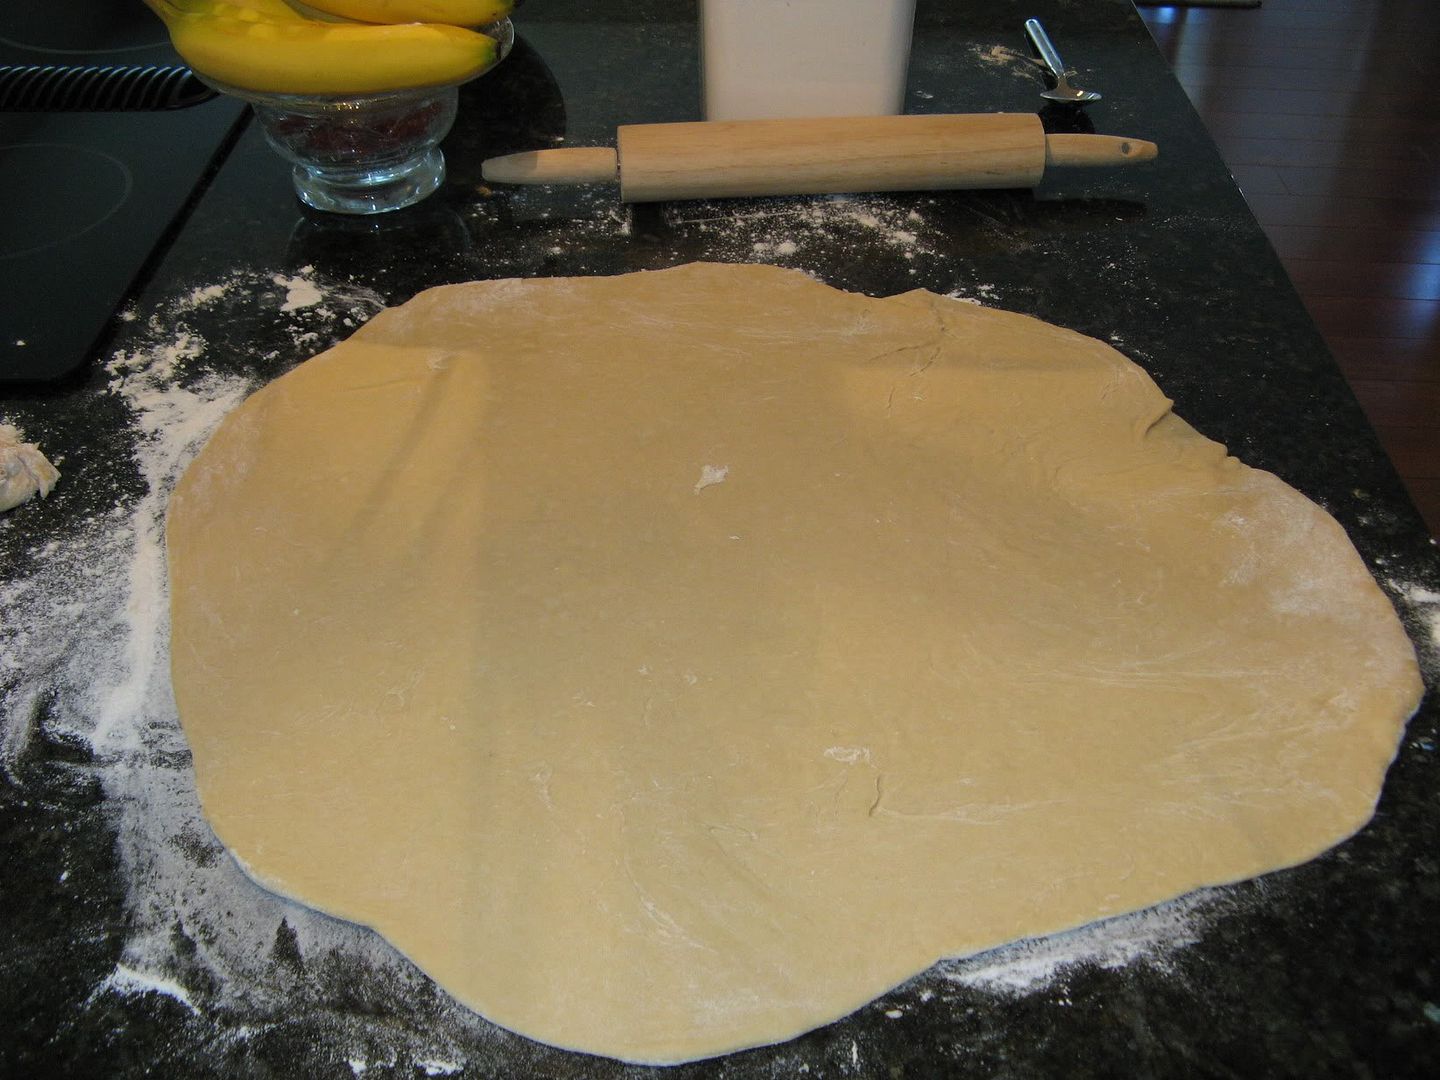
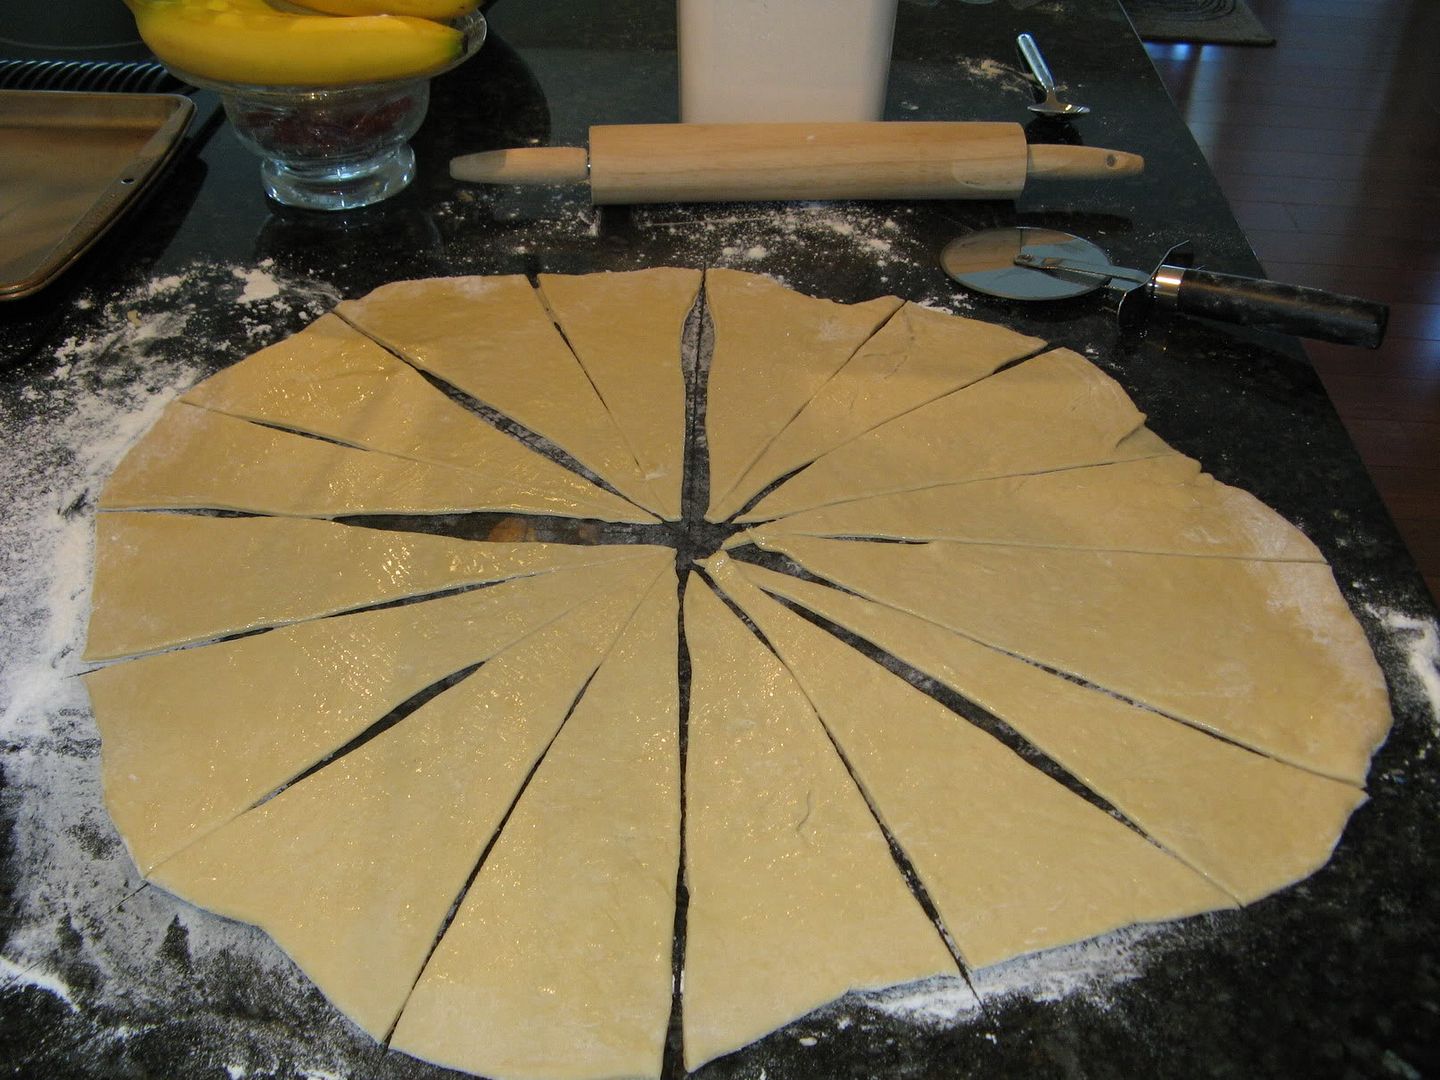
Once doubled in size, turn out onto a floured surface.  Toss to coat well with flour.  Kneed a few times or until no longer sticky.  Roll dough to a 15in circle and then brush with melted butter.  Cut into 16 wedges. With wide end, roll up each wedge toward the point.  Place point side down on greased baking sheet.

Bake in a pre-heated 400 degree oven for 15-20 min or until golden brown.


Tips and tricks and things I do differently:
**** I brush with melted butter as per the instructions, then once they are rolled and on the baking sheet I brush butter on them again.

**** In an effort to eat healthier I wanted to use wheat flour but Husband refuses because he doesn't like wheat.  So, my little trick is to put in 1 cup of white whole wheat and the rest I use normal white flour.  Eventually I would like to add more but that's going to be slow going so he doesn't notice a change in taste.

**** Rolling dough out on a counter top can be incredibly messy.  Here are a couple tips to try and keep mess to a minimum.  If you have a non-granite counter top (at least this works with Formica or whatever the normal counter top used to be, I have no idea if it works with other stone counter tops) you can wet the counter top and then put a piece of wax paper down.  Since it's wet the wax paper will stick to the counter top and you can roll out the dough on top of it and clean up is so much easier.    I have granite and this does not work, the wax paper doesn't stick.  If this is the same for you, you can spray the counter top with Pam or some other cooking spray.  This isn't perfect but trust me when I say it does work a lot better for clean up.

**** Try to let your eggs get to room temperature before baking with them.  This applies to cakes, cookies, omelets, etc.

****  Earlier this spring/summer I made 3 batches where the dough didn't rise  (of course we still baked them and ate them but they weren't as good.)  Then I made them again and decided to cover them (I always use glade press and seal) and put them in the un-finished section of our basement while I worked out.  An hour later, the dough had risen.  This batch was the most fluffy and  yummy tasting I have ever made. I just made these yesterday and did these thing.  Still incredibly fluffy but not like that first one.

****  I use a pizza cutter to cut my dough.  It's incredibly easy and because I have granite I'm not worried about scratching the counter top.  I cut it in half one way, then half the next way.  This gives me 4 even (haha..yeah right) sections. I then cut each section in half and then each of those sections in half again. 

As you can see, I never roll mine in a perfect circle.  I applaud the person that can, it seems to be something out of my grasp.


I also have failed to cut mine in perfect sizes, I always have some that are huge, some that are itty bitty, and some that are perfect.


Sunday, August 22, 2010

Weekend Cooking - Texas Potatoes

Weekend Cooking is hosted by Beth Fish Reads and is open to anyone who has any kind of food-related post to share: Book (novel, nonfiction) reviews, cookbook reviews, movie reviews, recipes, random thoughts, gadgets, fabulous quotations, photographs. If your post is even vaguely foodie, feel free to grab the button and link up anytime over the weekend. Please link to your specific post, not your blog's home page. For more information, see the welcome post.


This week, because my husband requested I make these yesterday for a family swim party and the recipe was already out on my counter, I'm sharing a Texas Potatoes recipe.  Many of you probably already have the same one or similar, but if not....here you go!  My family loves these..in fact I got this recipe from my sister who got it from one of my aunts.  I would have to say that 9 out of 10 times there is a gathering that involves food, Texas Potatoes makes an appearance.  It's not the healthiest, but it sure is yummy.

Ingredients
1 bag square hash browns
1 can cream of chicken soup
16 oz sour cream
8 oz mozzarella cheese
1/2 cup butter
salt and pepper to taste
cheddar cheese

Directions
Pre-heat oven to 350f  (or...a lot of times I'll make this dish the day before and store it in the fridge.  I'll take it out a little before I have to cook it to let it start warming up but the cooktime is usually the same)

Mix together the hash browns, cream of chicken soup, sour cream, and mozzarella cheese.  Salt and pepper to taste.

Spread in a 9x13" pan.  Melt butter and pour over the top.  Put cheddar cheese on top.

Bake for 45 min.

Saturday, August 7, 2010

Weekend Cooking: Pizza Sauce

Weekend Cooking is open to anyone who has any kind of food-related post to share: Book (novel, nonfiction) reviews, cookbook reviews, movie reviews, recipes, random thoughts, gadgets, fabulous quotations, photographs. If your post is even vaguely foodie, feel free to grab the button and link up anytime over the weekend. Please link to your specific post, not your blog's home page. For more information, see the welcome post.


I decided to join in this week because I have a pizza sauce recipe.  Last weekend Beth Fish Reads shared a grilled pizza recipe.  I commented that I wanted to try it and use my pizza sauce recipe to make it all homemade.  She then asked for the pizza sauce recipe and I obliged.  Then I thought, heck, why not share it on my blog and participate in her weekly feature.


Pizza Sauce

Ingredients
1 can (28 oz) italian tomato sauce
1 tablespoon extra virgin olive oil
1/2 teaspoon dried basil
1/2 teaspoon dried oregano
1/4 teaspoon garlic powder
1/4 teaspoon fresh ground black pepper
salt to taste (optional)

Directions
In a large saucepan, bring tomato sauce, olive oil, and spices to a simmer.  Simmer, uncovered, stirring occasionally, for about 20 minutes, or until sauce reduces to about 2 1/2 cups.  (Monitor sauce to prevent bubbling/splattering during simmering.) Taste and season with salt, if desired.  Cool to room temperature. Sauce keeps covered and chilled for about 5 days.  Maybe frozen.


I don't have any pictures for you, sorry.  I haven't actually made this in awhile.  I do want to make it and freeze it for when I need it.  The problem is that I don't really like to cook, so I don't make it ahead of time and then when we plan to make pizza, I just buy all the fixings.  Maybe this weekend..or next.  :)

Actually, I'm hoping some of my husbands co-workers give him tomatoes from their yard.  Then I could make this using fresh tomatoes instead of canned.  Maybe my sister would give me some fresh  herbs too.  Then I could use all fresh ingredients.  Yumm..now I'm hungry and craving fresh pizza sauce on a homemade pizza.